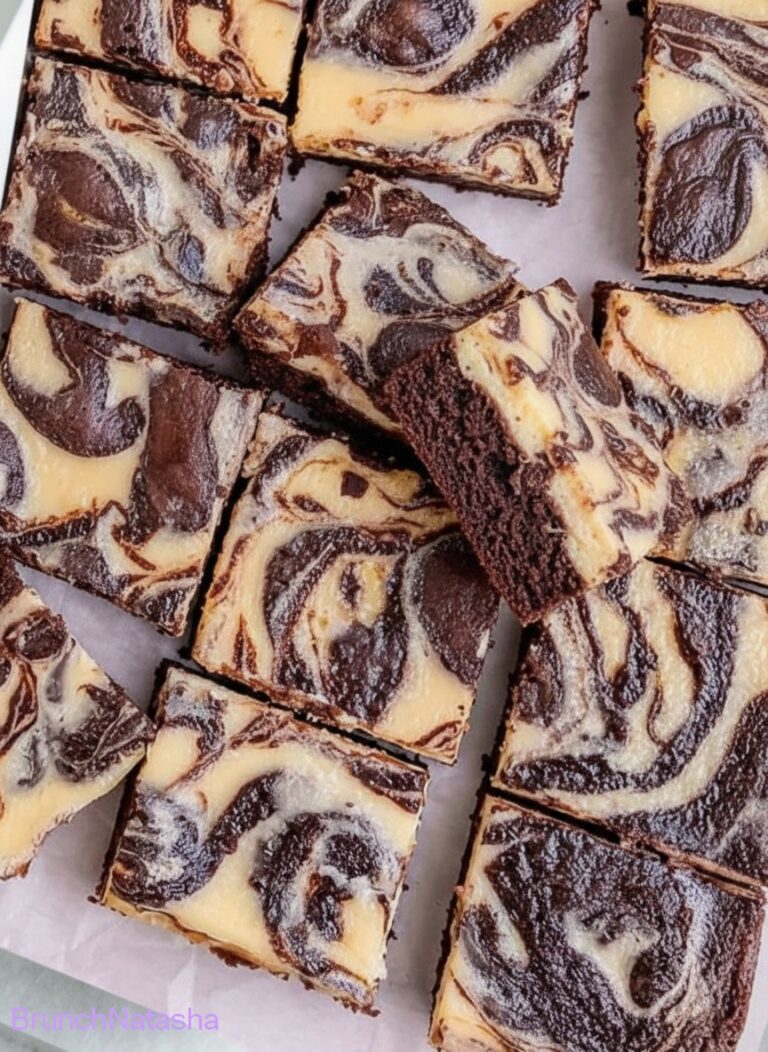
Gluten Free Brownies are rich, chocolatey dessert bars made without any wheat flour or ingredients that contain gluten. Instead of regular flour, these brownies use gluten-free flour blends, almond flour, or other gluten-free alternatives. They have the same fudgy texture and delicious chocolate flavor that people love about traditional brownies, but they are suitable for those who need or choose to avoid gluten.
These brownies are perfect for family gatherings, bake sales, lunchbox treats, or simply satisfying a chocolate craving. Even people who do not follow a gluten-free diet often enjoy them because they are moist, chewy, and packed with chocolate flavor. Best of all, they are easy to make with simple ingredients that you may already have in your kitchen.
Why You Should Try Gluten Free Brownies
If you love chocolate desserts, Gluten Free Brownies are a must-try recipe. They are rich, decadent, and incredibly satisfying. You do not have to sacrifice flavor or texture just because a recipe is gluten-free. In fact, many people cannot even tell the difference between these brownies and traditional brownies.
Another great reason to make these brownies is their simplicity. The recipe requires basic ingredients, minimal preparation, and only one bowl for mixing. Whether you are baking for someone with gluten sensitivity or simply looking for a delicious homemade dessert, these brownies are a fantastic choice.
Table of Contents
Gluten Free Brownies Ingredients
- 1/2 cup unsalted butter, melted
- 1 cup granulated sugar
- 2 large eggs
- 1 teaspoon vanilla extract
- 1/2 cup unsweetened cocoa powder
- 3/4 cup gluten-free all-purpose flour blend
- 1/4 teaspoon salt
- 1/2 teaspoon baking powder
- 1/2 cup chocolate chips
Optional Add-Ins
- Chopped walnuts
- Pecans
- White chocolate chips
- Peanut butter swirls
- Caramel drizzle
How to Make Gluten Free Brownies
Step 1: Prepare the Oven and Baking Pan
Preheat your oven to 350°F (175°C) so it is fully heated when the batter is ready. Line an 8×8-inch baking pan with parchment paper, leaving some paper hanging over the sides for easy removal later. Lightly grease the paper or pan to prevent sticking and ensure the brownies come out neatly after baking.
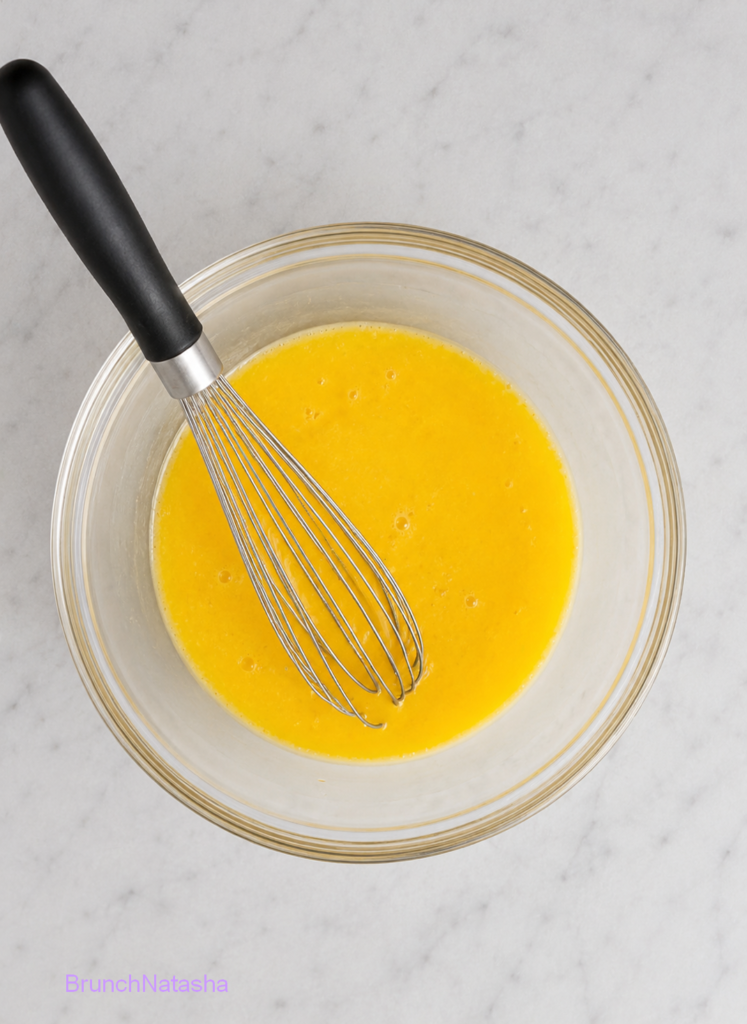
Step 2:Mix the Wet Ingredients
In a large mixing bowl, whisk together the melted butter and sugar until smooth and well combined. Add the eggs and whisk until the mixture becomes slightly lighter in color. Stir in the vanilla extract and continue mixing until all the ingredients are fully incorporated and the mixture looks glossy.
Step 3: Add the Dry Ingredients
Add the cocoa powder, gluten-free flour, salt, and baking powder to the bowl. Using a spatula or wooden spoon, gently stir everything together until a thick, rich chocolate batter forms. Make sure there are no pockets of dry flour, but avoid overmixing to keep the brownies soft and tender.
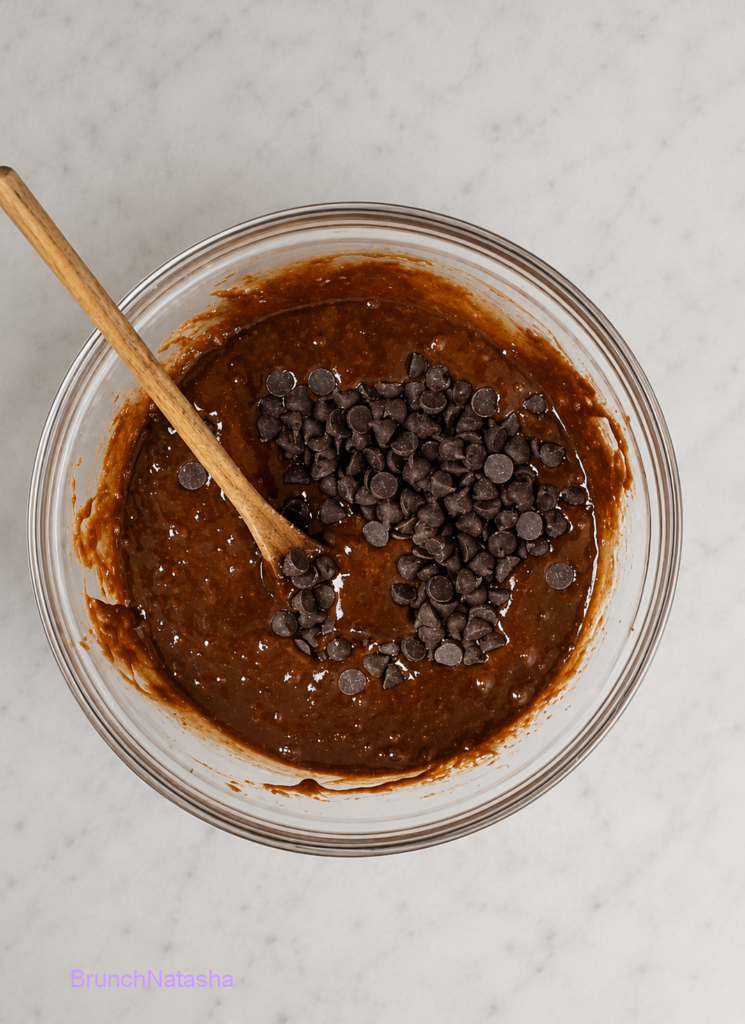
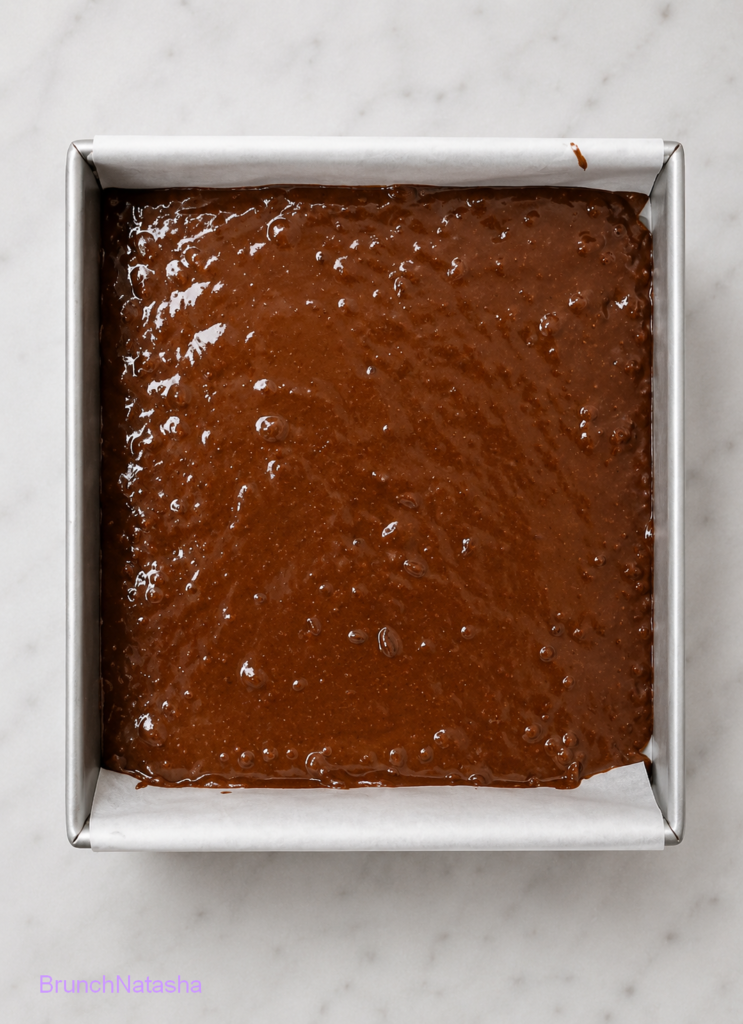
Step 4: Fold in the Chocolate Chips and Prepare for Baking
Gently fold the chocolate chips into the batter, distributing them evenly throughout the mixture. Pour the batter into the prepared baking pan and spread it evenly into the corners. Smooth the top with a spatula so the brownies bake evenly and have a nice appearance when finished.
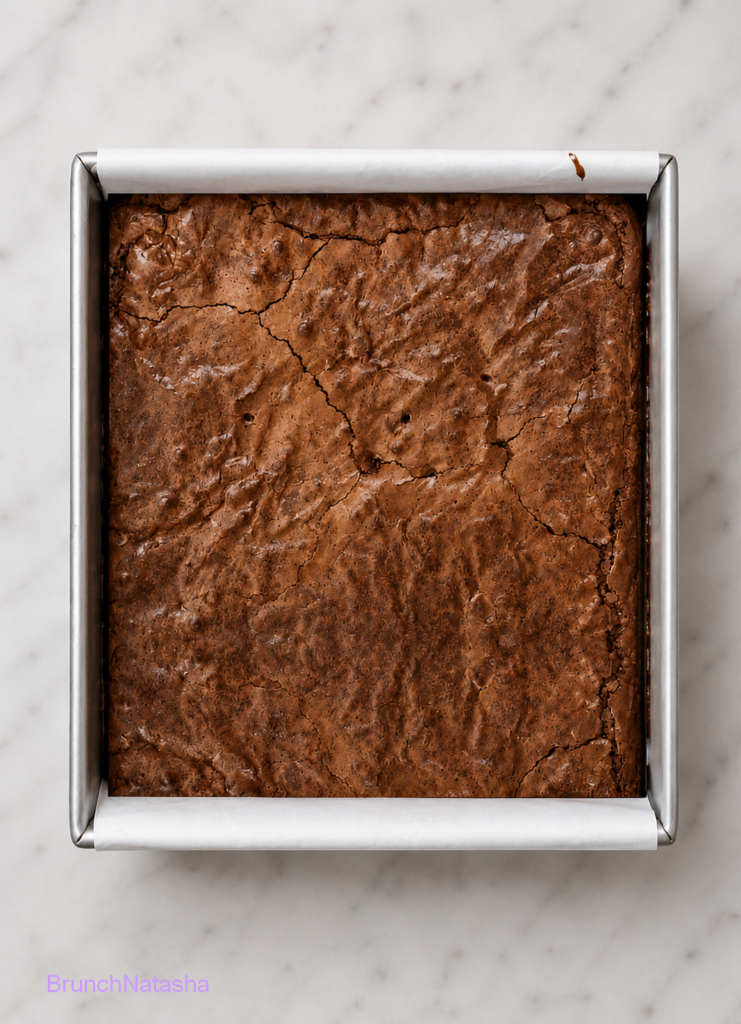
Step 5: Bake Until Fudgy and Delicious
Place the pan in the center of the preheated oven and bake for 22 to 28 minutes. Check the brownies near the end of the baking time by inserting a toothpick into the center. If it comes out with a few moist crumbs attached, they are ready. Avoid overbaking, as this can make the brownies dry instead of rich and fudgy.
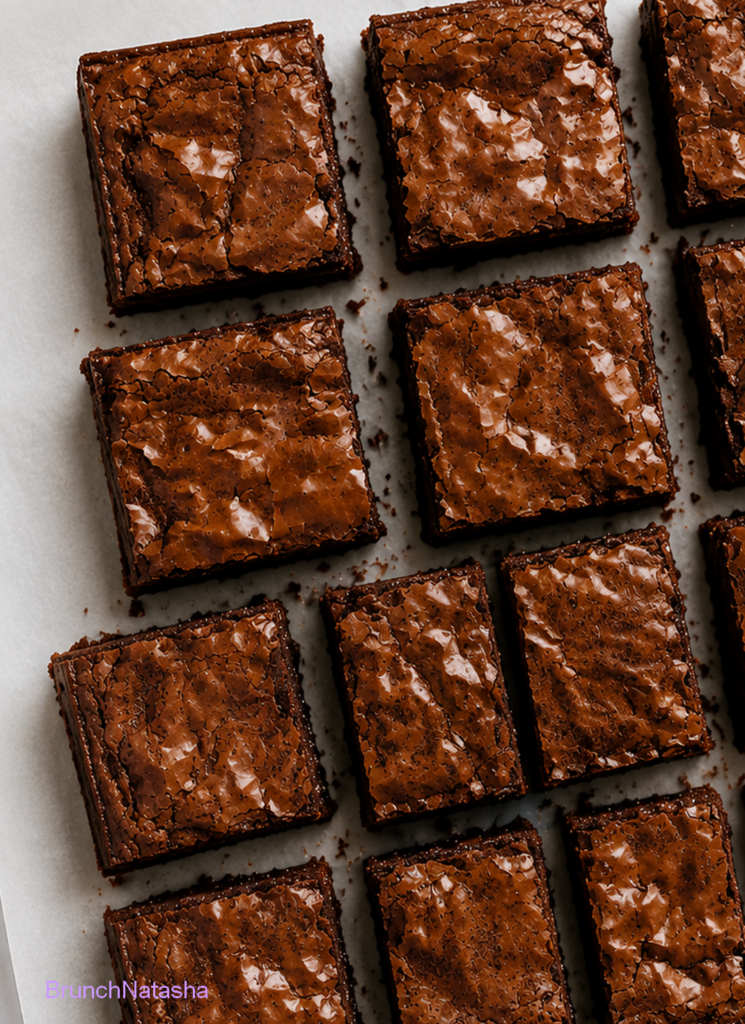
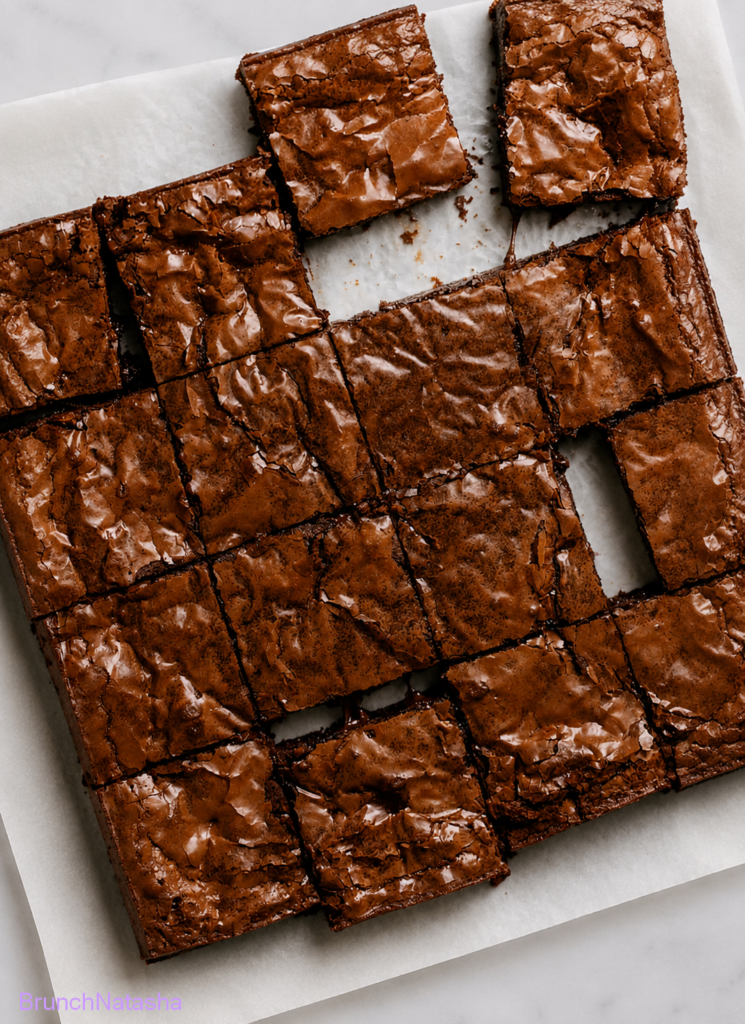
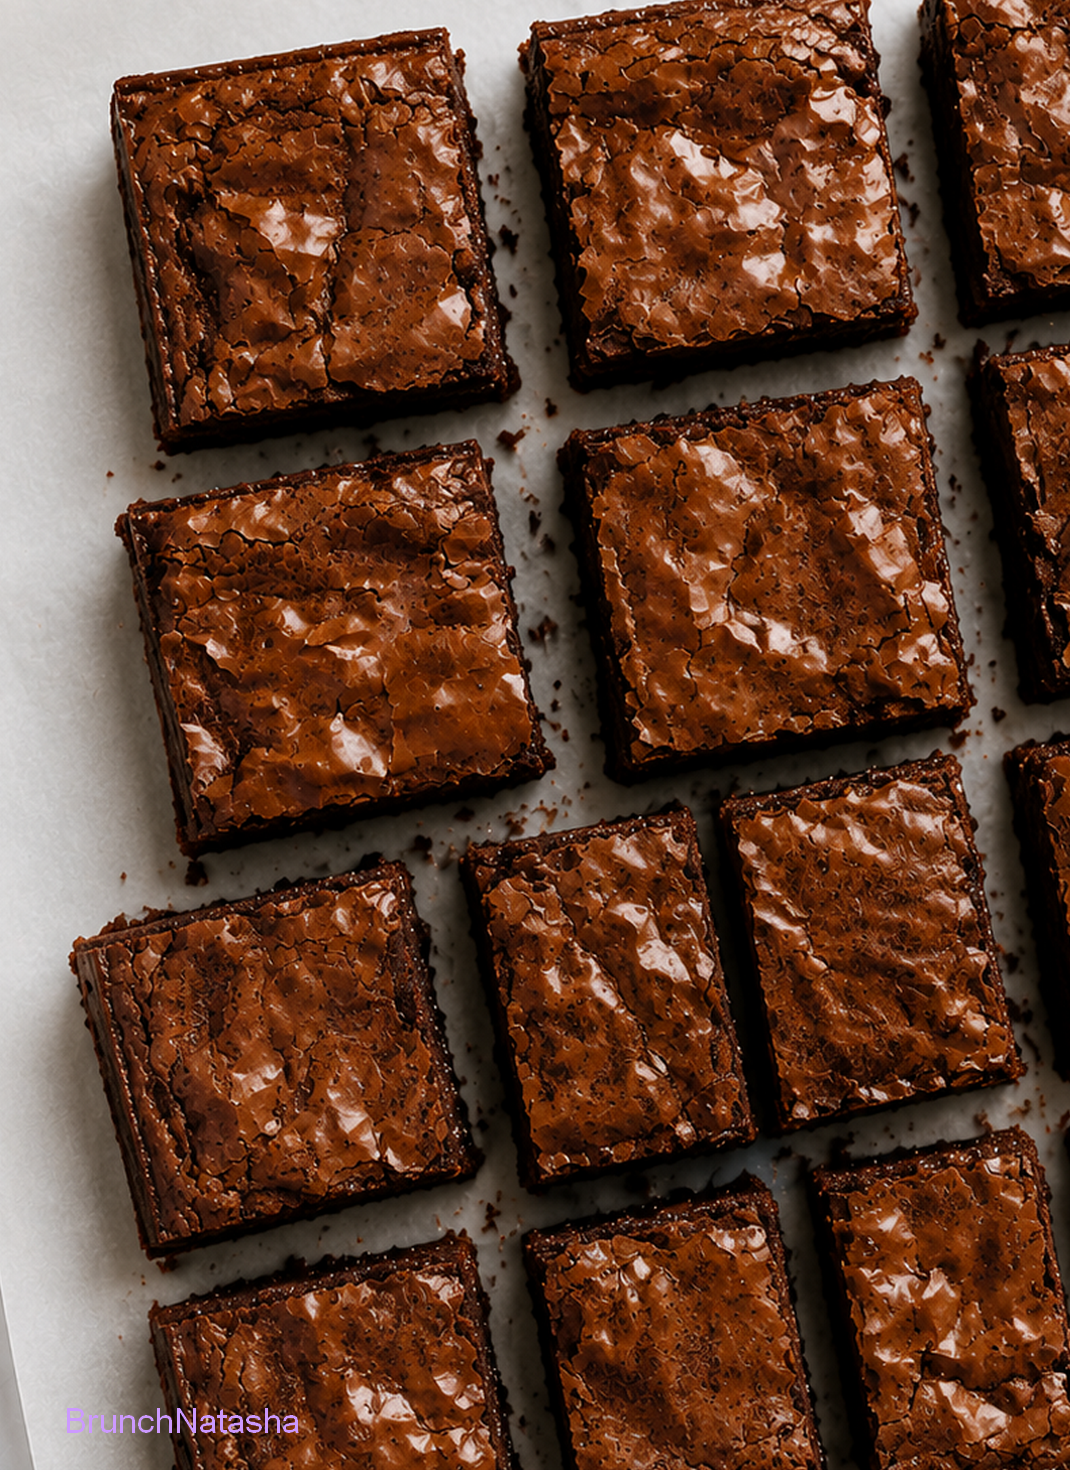
Step 6: Cool, Slice, and Enjoy
Remove the brownies from the oven and allow them to cool completely in the pan on a wire rack. Once cooled, lift them out using the parchment paper and place them on a cutting board. Slice into squares with a sharp knife and serve. Enjoy them on their own, with a glass of milk, or topped with a scoop of vanilla ice cream for an extra-special dessert.
Why You’ll Love This Recipe
- Rich, fudgy texture that tastes just like classic brownies.
- Completely gluten-free, making it perfect for those avoiding gluten.
- Easy to make with simple pantry ingredients.
- Loaded with deep chocolate flavor in every bite.
Tips and Shortcuts
- Melt the butter completely for a smoother batter.
- Add extra chocolate chips for a richer chocolate flavor.
- Swirl peanut butter or caramel into the batter for a fun variation.
- Use parchment paper for easy removal and cleanup.
What to Serve with Gluten Free Brownies
I love serving these gluten free brownies to my family as a rich and chocolatey treat. They pair wonderfully with fresh berries, whipped cream, or a scoop of vanilla ice cream, and we enjoy them with coffee, Smoothie, or hot chocolate.
Frequently Asked Questions
What makes these brownies gluten-free ?
These brownies use gluten-free flour instead of traditional wheat flour, making them suitable for people who avoid gluten.
Can I add nuts to the recipe ?
Yes, chopped walnuts or pecans are great additions.
Why do my brownies crumble ?
Using too little moisture or overbaking can cause crumbly brownies.
Can I use cocoa powder instead of melted chocolate ?
Yes, unsweetened cocoa powder works perfectly in this recipe.
How to Store Leftovers
Refrigerator Storage
Store cooled brownies in an airtight container in the refrigerator for up to 1 week. Let them come to room temperature or warm slightly before serving.
Freezer Storage
Wrap brownies individually and place them in a freezer-safe container or bag. Freeze for up to 3 months and thaw before enjoying.
Gluten Free Brownies
Course: DessertCuisine: AmericanDifficulty: Easy9
servings10
minutes25
minutes220
kcal35
minutesThese Gluten Free Brownies are rich, fudgy, and packed with chocolate flavor. Made with simple ingredients and a gluten-free flour blend, they are an easy dessert that everyone will love.
Ingredients
1/2 cup unsalted butter, melted
1 cup granulated sugar
2 large eggs
1 teaspoon vanilla extract
1/2 cup unsweetened cocoa powder
3/4 cup gluten-free all-purpose flour blend
1/4 teaspoon salt
1/2 teaspoon baking powder
1/2 cup chocolate chips
Chopped walnuts
Pecans
White chocolate chips
Peanut butter swirls
Caramel drizzle
Directions
- Step 1: Prepare the Oven and Baking Pan :Preheat your oven to 350°F (175°C) so it is fully heated when the batter is ready. Line an 8x8-inch baking pan with parchment paper, leaving some paper hanging over the sides for easy removal later. Lightly grease the paper or pan to prevent sticking and ensure the brownies come out neatly after baking.
- Step 2:Mix the Wet Ingredients :In a large mixing bowl, whisk together the melted butter and sugar until smooth and well combined. Add the eggs and whisk until the mixture becomes slightly lighter in color. Stir in the vanilla extract and continue mixing until all the ingredients are fully incorporated and the mixture looks glossy.
- Step 3: Add the Dry Ingredients :Add the cocoa powder, gluten-free flour, salt, and baking powder to the bowl. Using a spatula or wooden spoon, gently stir everything together until a thick, rich chocolate batter forms. Make sure there are no pockets of dry flour, but avoid overmixing to keep the brownies soft and tender.
- Step 4: Fold in the Chocolate Chips and Prepare for Baking :Gently fold the chocolate chips into the batter, distributing them evenly throughout the mixture. Pour the batter into the prepared baking pan and spread it evenly into the corners. Smooth the top with a spatula so the brownies bake evenly and have a nice appearance when finished.
- Step 5: Bake Until Fudgy and Delicious :Place the pan in the center of the preheated oven and bake for 22 to 28 minutes. Check the brownies near the end of the baking time by inserting a toothpick into the center. If it comes out with a few moist crumbs attached, they are ready. Avoid overbaking, as this can make the brownies dry instead of rich and fudgy.
- Step 6: Cool, Slice, and Enjoy :Remove the brownies from the oven and allow them to cool completely in the pan on a wire rack. Once cooled, lift them out using the parchment paper and place them on a cutting board. Slice into squares with a sharp knife and serve. Enjoy them on their own, with a glass of milk, or topped with a scoop of vanilla ice cream for an extra-special dessert.
Notes
- Sift the cocoa powder to prevent lumps in the batter.
- Do not overmix the batter once the flour is added.
- Let the brownies cool completely before cutting.
- Use real butter for a richer flavor.
Save this recipe for later on Pinterest