
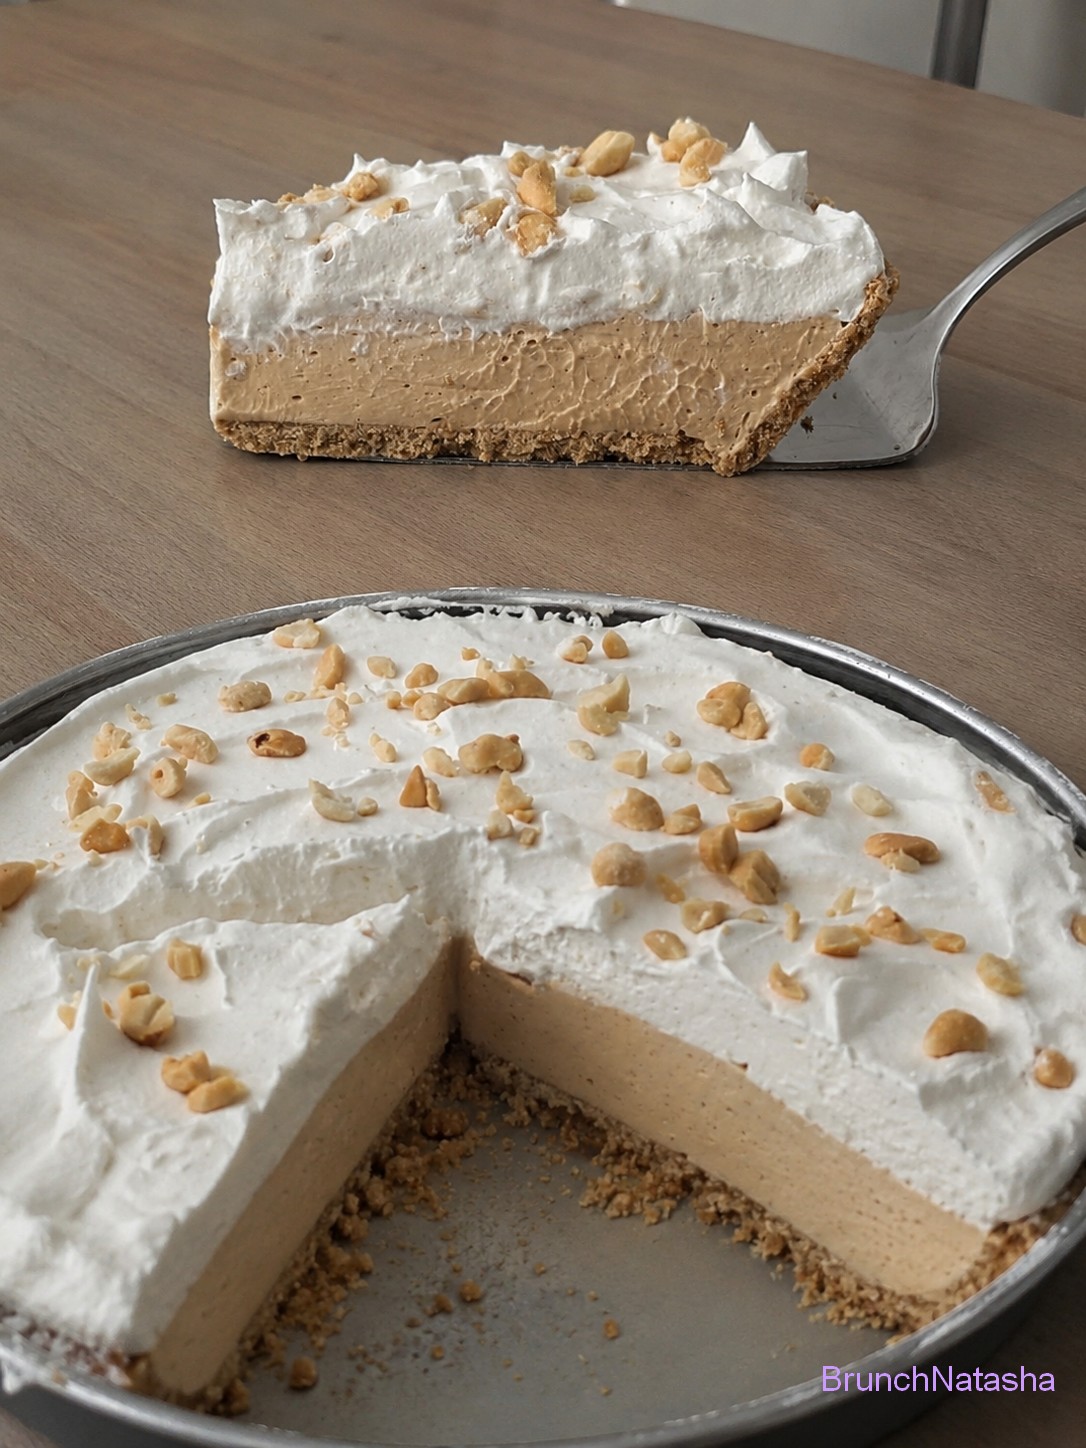
No-Bake Creamy Peanut Butter Pie is a rich and creamy dessert that is incredibly easy to make. It combines smooth peanut butter, cream cheese, and a fluffy filling in a sweet cookie crust for the perfect mix of creamy, nutty, and slightly sweet flavors. Since there is no oven needed, this pie comes together with very little effort and sets beautifully in the refrigerator.
This pie is perfect for family gatherings, holidays, parties, or whenever you need a quick dessert without turning on the oven. Serve it chilled with whipped cream, chocolate shavings, or a drizzle of chocolate or peanut butter sauce on top. Each slice is smooth, indulgent, and packed with peanut butter flavor that both kids and adults will love.
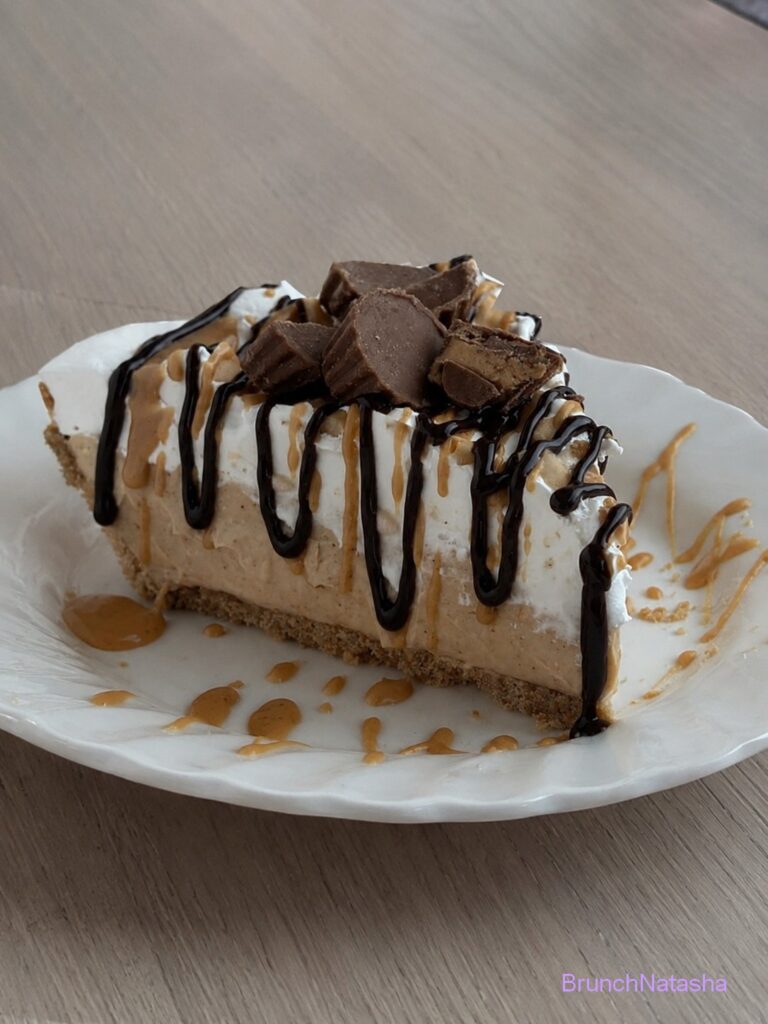
Table of Contents
No-Bake Creamy Peanut Butter Pie Ingredients
Here’s what you need to make No-Bake Creamy Peanut Butter Pie:
- 1 prepared graham cracker crust or cookie crust
- 1 cup creamy peanut butter
- 8 oz (1 block) cream cheese, softened
- 1 cup powdered sugar
- 1 teaspoon vanilla extract
- 1 ½ cups whipped topping like whipped cream or Cool Whip
- Optional: chocolate syrup for topping
- Optional: chopped peanuts or chocolate chips for decoration
How to Make No-Bake Creamy Peanut Butter Pie
Step 1: Prepare the Crust
In a medium mixing bowl, combine the graham cracker crumbs and melted butter, stirring until all of the crumbs are evenly coated and the mixture resembles wet sand. Transfer the mixture to a 9-inch pie dish and press it firmly across the bottom and up the sides to create an even crust. Place the crust in the refrigerator for 20–30 minutes to chill and firm up while you prepare the filling.
Step 2: Make the Peanut Butter Filling
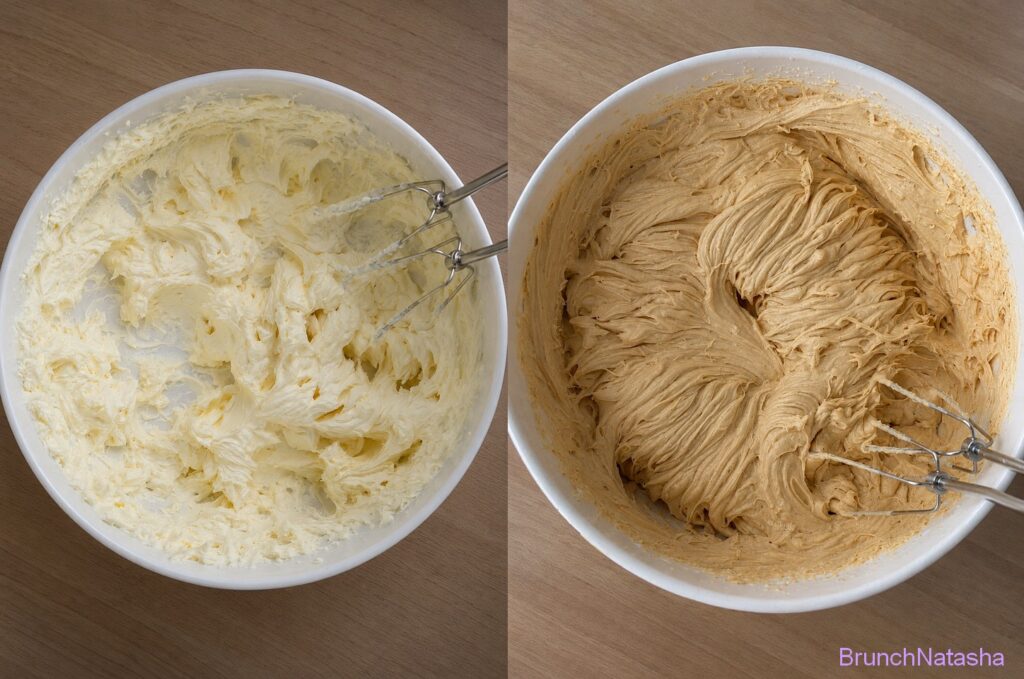
In a large mixing bowl, beat the softened cream cheese until completely smooth and creamy with no lumps remaining. Add the creamy peanut butter, powdered sugar, and vanilla extract, then continue mixing until the ingredients are fully incorporated and the filling is thick, rich, and silky smooth.
Step 3: Fold in the Whipped Topping
Using a rubber spatula, gently fold the whipped topping into the peanut butter mixture, taking care not to overmix. Continue folding until the mixture becomes light, fluffy, and evenly blended, creating a smooth and airy filling that will give the pie its signature creamy texture.
Step 4: Fill the Pie Crust
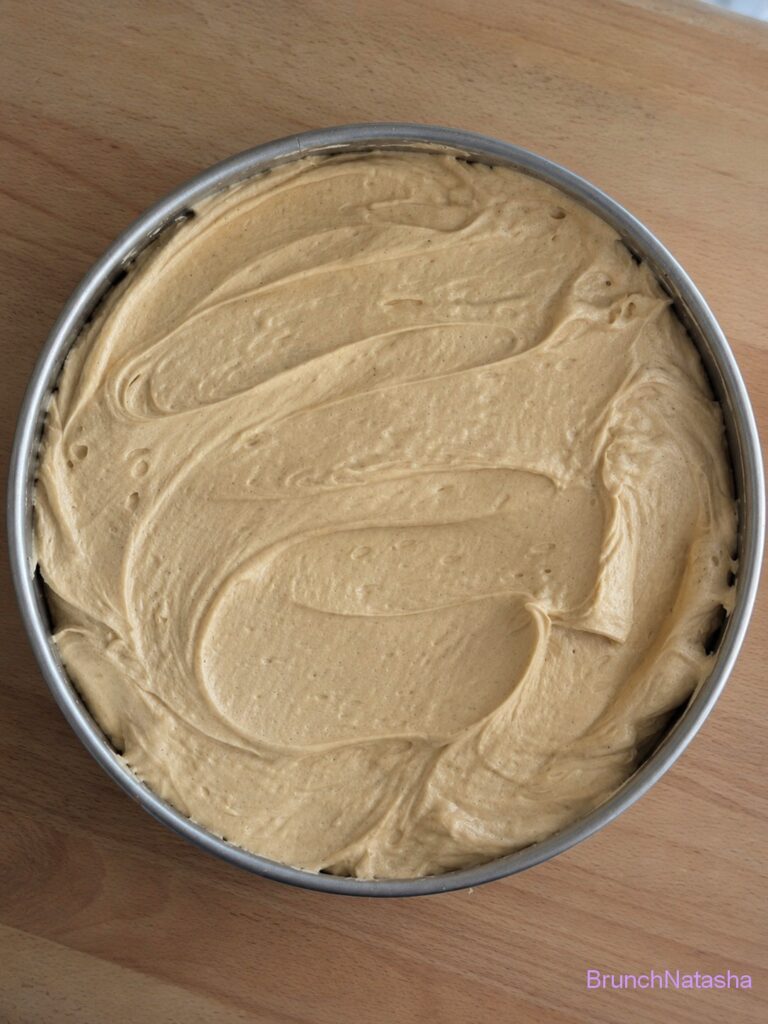
Remove the chilled crust from the refrigerator and spoon the peanut butter filling into it. Spread the filling evenly with a spatula, making sure it reaches all edges of the crust, then smooth the top to create a neat and attractive finish. If desired, sprinkle chopped peanuts, mini chocolate chips, or drizzle chocolate syrup over the top for extra flavor and decoration.
Step 5: Chill Until Set
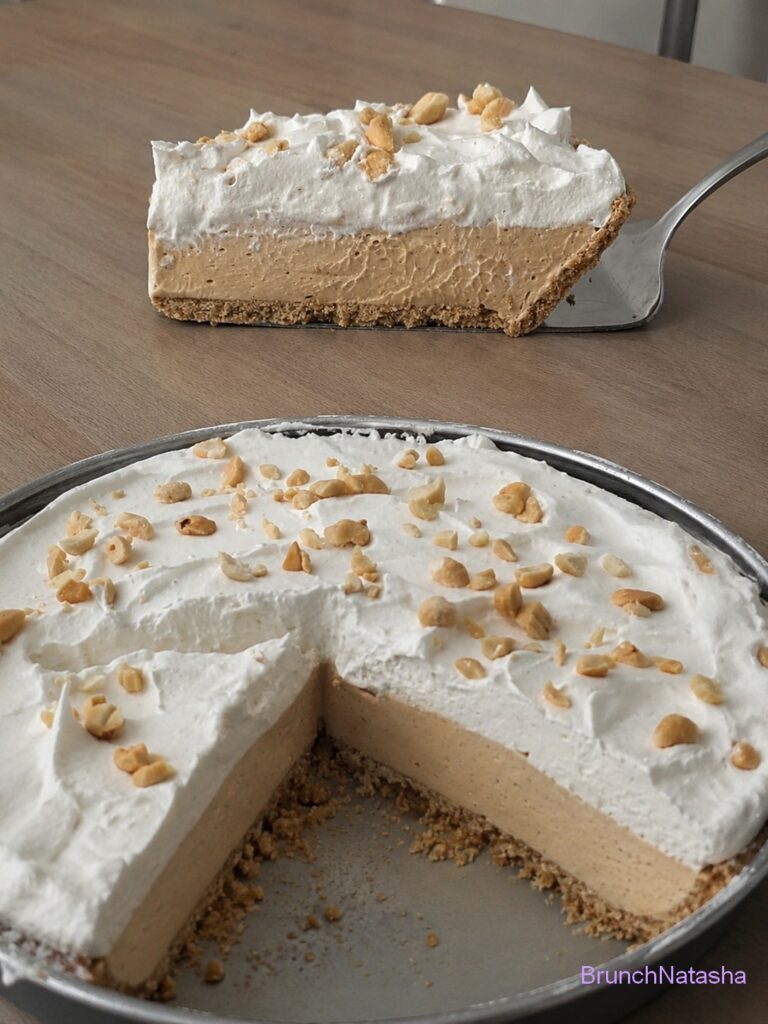
Carefully place the pie in the refrigerator and allow it to chill for at least 4–6 hours, although overnight chilling is recommended for the best texture and flavor. During this time, the filling will become firm enough to slice easily while remaining deliciously creamy.
Step 6: Garnish and Serve
Once the pie is fully chilled and set, remove it from the refrigerator and add any additional toppings such as whipped cream, chocolate shavings, peanut butter drizzle, or crushed cookies. Slice the pie with a sharp knife, cleaning the blade between cuts for neat slices, and serve cold for the most refreshing and flavorful dessert experience.
Why You’ll Love This Recipe
- No oven required, making it perfect for warm days and busy schedules.
- Rich peanut butter flavor in every creamy and delicious bite.
- Made with simple ingredients that are easy to find at any grocery store.
- Light, fluffy filling paired with a crunchy crust for the perfect texture.
Tips and Shortcuts
- Soften the cream cheese before mixing to avoid lumps.
- Use creamy peanut butter for the smoothest filling.
- Let the pie chill overnight for the best texture.
- Fold the whipped topping gently to keep the filling light.
What to Serve with No-Bake Creamy Peanut Butter Pie
I like making no-bake creamy peanut butter pie when I want a dessert that’s rich, smooth, and incredibly easy to prepare. The creamy peanut butter filling is packed with flavor and sits on a delicious crust, creating a treat that feels special without much effort. It’s perfect for family gatherings, holidays, or anytime you need a quick dessert. My daughter loves it because it’s sweet, creamy, and full of peanut butter flavor. At home we usually serve it chilled straight from the fridge. It goes really well with coffee, milk, or a smoothie.
Frequently Asked Questions
Do I need to bake the crust ?
No, this is a completely no-bake recipe, so the crust only needs to be chilled.
How long should the pie chill before serving ?
The pie should chill for at least 4–6 hours, but overnight is recommended for the best results.
Why is my filling too soft ?
The pie may need additional chilling time, or the whipped topping may have been overmixed.
What if I don’t have a mixer ?
You can mix by hand with a whisk, although it may take a little more effort.
How to Store Leftovers
Store any leftover No-Bake Creamy Peanut Butter Pie in the refrigerator by covering it tightly with plastic wrap or transferring slices to an airtight container. Keeping the pie properly covered helps prevent it from drying out and keeps the filling smooth and creamy. The pie will stay fresh in the refrigerator for up to 5 days.
If you would like to store it for a longer period, you can freeze the pie. Wrap the whole pie or individual slices tightly in plastic wrap and place them in a freezer-safe container. Freeze for up to 1 month. When ready to enjoy, transfer the pie to the refrigerator and let it thaw overnight. For the best texture and flavor, serve the pie chilled directly from the refrigerator.
No-Bake Creamy Peanut Butter Pie
Course: DessertCuisine: AmericanDifficulty: Easy8
servings20
minutes450
kcal4
hours20
minutesThis No-Bake Creamy Peanut Butter Pie is a rich, smooth, and fluffy dessert made with peanut butter, cream cheese, and whipped topping in a crunchy graham cracker crust. It's easy to make, requires no oven, and is perfect for any occasion.
Ingredients
1 prepared graham cracker crust or cookie crust
1 cup creamy peanut butter
8 oz (1 block) cream cheese, softened
1 cup powdered sugar
1 teaspoon vanilla extract
1 ½ cups whipped topping like whipped cream or Cool Whip
Optional: chocolate syrup for topping
Optional: chopped peanuts or chocolate chips for decoration
Directions
- Step 1: Prepare the Crust :In a medium mixing bowl, combine the graham cracker crumbs and melted butter, stirring until all of the crumbs are evenly coated and the mixture resembles wet sand. Transfer the mixture to a 9-inch pie dish and press it firmly across the bottom and up the sides to create an even crust. Place the crust in the refrigerator for 20–30 minutes to chill and firm up while you prepare the filling.
- Step 2: Make the Peanut Butter Filling :In a large mixing bowl, beat the softened cream cheese until completely smooth and creamy with no lumps remaining. Add the creamy peanut butter, powdered sugar, and vanilla extract, then continue mixing until the ingredients are fully incorporated and the filling is thick, rich, and silky smooth.
- Step 3: Fold in the Whipped Topping :Using a rubber spatula, gently fold the whipped topping into the peanut butter mixture, taking care not to overmix. Continue folding until the mixture becomes light, fluffy, and evenly blended, creating a smooth and airy filling that will give the pie its signature creamy texture.
- Step 4: Fill the Pie Crust :Remove the chilled crust from the refrigerator and spoon the peanut butter filling into it. Spread the filling evenly with a spatula, making sure it reaches all edges of the crust, then smooth the top to create a neat and attractive finish. If desired, sprinkle chopped peanuts, mini chocolate chips, or drizzle chocolate syrup over the top for extra flavor and decoration.
- Step 5: Chill Until Set :Carefully place the pie in the refrigerator and allow it to chill for at least 4–6 hours, although overnight chilling is recommended for the best texture and flavor. During this time, the filling will become firm enough to slice easily while remaining deliciously creamy.
- Step 6: Garnish and Serve :Once the pie is fully chilled and set, remove it from the refrigerator and add any additional toppings such as whipped cream, chocolate shavings, peanut butter drizzle, or crushed cookies. Slice the pie with a sharp knife, cleaning the blade between cuts for neat slices, and serve cold for the most refreshing and flavorful dessert experience.
Notes
- Chill the crust before adding the filling.
- Refrigerate the pie overnight for the best flavor.
- Use a pre-made crust to save preparation time.
- Try a chocolate cookie crust for a richer dessert.
Save this recipe for later on Pinterest


3 Comments
Comments are closed.